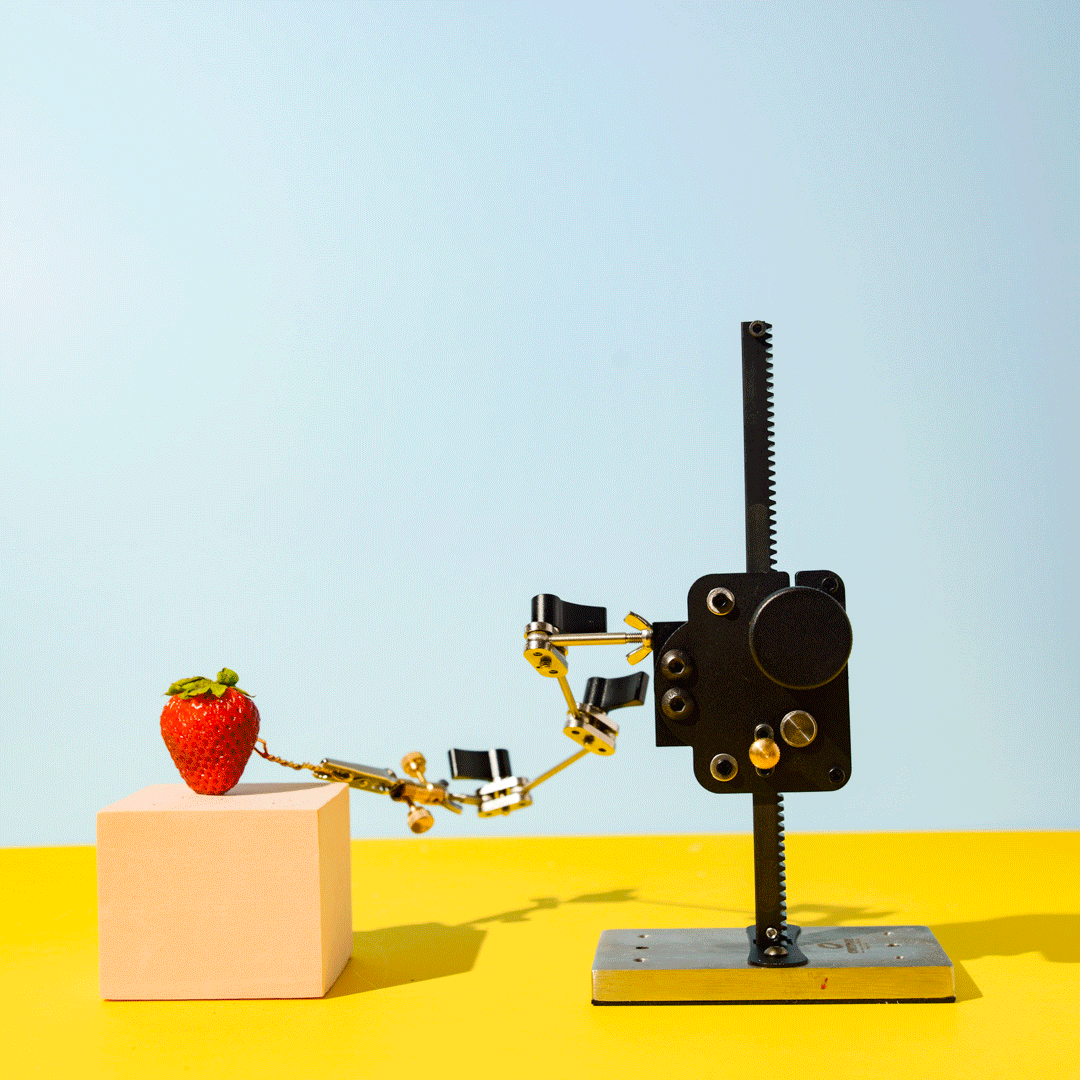
Do you ever wonder how products float and bounce in stop motion animation? The secret is using rigs such as the one you see below.
Once you edit out the rig, you end up with this beautiful bouncing shot!

But how exactly do you use a rig? And how do you make it invisible in your final animation?
The answer is easier than you think, and we'll show you how to do it!
What Are Rigs?
Puppets, or in our case, products, can't move around by themselves. So when creating stop motion, animators often use rigs to support them when animating.
There are many types of rigs, as you can see in our image below. Some options are small enough to fit in tight spaces. Meanwhile, others feature knobs that let you precisely control both the horizontal and vertical movements of your "characters."

Keep in mind that rigs have a weight limit (a.k.a. maximum payload). After all, you can't expect a small rig to support a 20lbs dumbbell. In most cases, a maximum payload of 200 or 300 grams should be enough. If you're wondering, that weight is equivalent to a small can of soup.
Rigs also come with different types of adapters. You can use them to connect an object or a puppet to your rigging assembly.
The most common adapter is an alligator clip. It does an excellent job pinching objects to keep them in place.

But as you know, you can't hold every object with an alligator clip. The more practical attachment to use is the flat adapter. You can stick a double-sided tape onto it and attach it to the object you want to animate.

If you need a decent rig right away, you can try using a helping hand instead. It's technically a watchmaker's tool. But it has arms, joints, and alligator clips that look and work the same as professional options. The only issue is they're stiffer and can't hold a lot of weight.

If the limited options on Amazon aren't enough, you can also buy a few sellers from Etsy or eBay that offer customized rigs. And if you need more options, you can try websites such as animationsupplies.net or Kinetic Armatures.
How Do You Make DIY Rigs?
We definitely understand if you don't have a budget for a professional rig yet. Thankfully, you can always create one with aluminum wire!

If you need a six-inch rig, all you have to do is unroll a twelve-inch worth of wire and bend it in the middle.

Now, place a long object (such as a pen or even a screwdriver) through where the wire bends.

Pinch the tips of the wire with a pair of pliers and start twisting the other end with your pen or screwdriver until you make a loop.

Keep twisting the wire until all you have left is a little loop on the other end. As you can see in the picture below, you can bend that loop and use it as a stand to keep your rig upright. You can also secure it with blue tack to make sure it stays in place while animating.

This technique of twisting wire is so helpful that you can use it for just about anything when animating.

In fact, most animators use this method when creating armatures for puppets. And in our work, we even use a few as tiny "forks" to hold up squishy food!
How Do You Use Rigs?
You know how it's like to adjust the neck of a desk lamp. Rigs feel precisely the same way. They have joints that let you move the object you're animating fluidly. You can adjust how rigid you want the joints by tightening or loosening them with Allen keys.

Although using rigs is relatively straightforward to use, there are a few things you need to remember. When animating, you have to:
Attach them behind your subject so they don't obstruct the front of the product.
Place them where you have enough space to move them around.
Move them carefully so you don't accidentally move your subject out of its place.
Make sure they don't interfere with your subject's shadow.
Think of rigs as the strings to your puppet. You have to control them well to achieve the movements you want. So you may have to practice your moves before animating. But don't worry. You'll feel comfortable using them after a few tries.
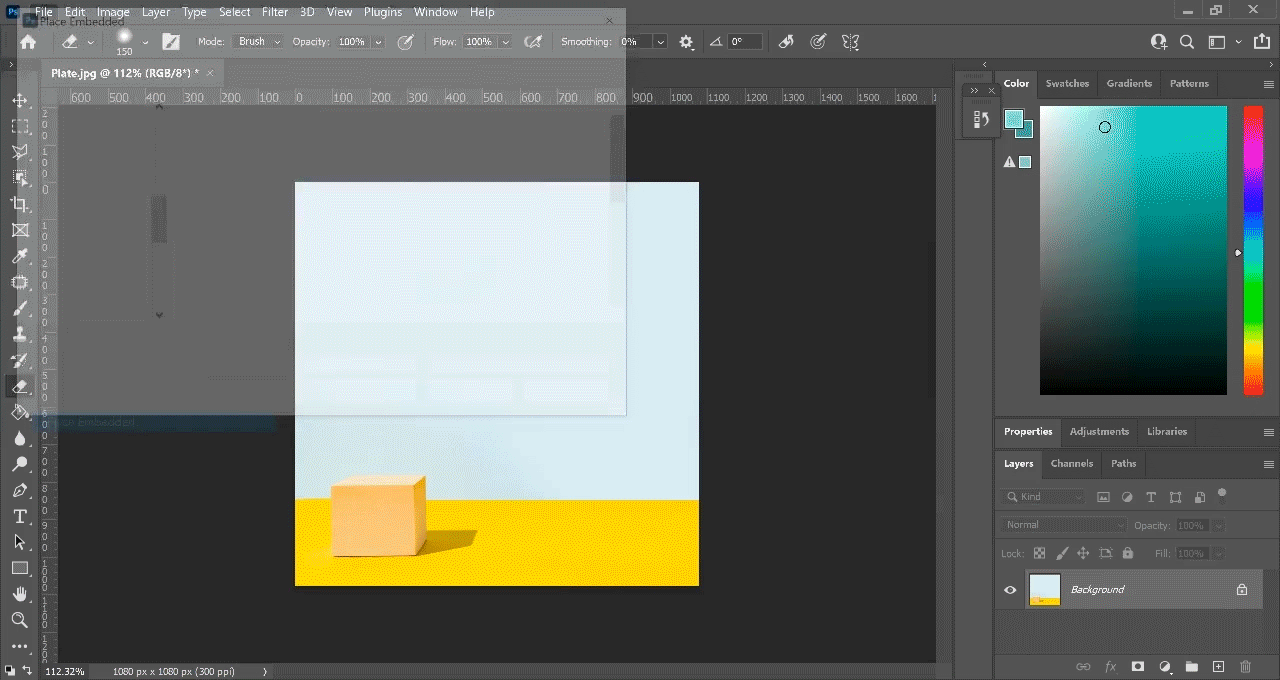
Shooting a Plate
When animating with rigs, you'll first need to shoot what's called a Plate. It's simply an image of the background without the moving pieces.
For our jumping strawberry animation, we shot this plate:

Since the cream-colored block didn't have to move in our animation, we kept it in that place. But if it were to move, we would have removed it from our plate.
After you shoot the plate, you can now start positioning the moving parts in your animation. In our case, those moving parts would be the strawberry and the rig.
Now you must be wondering: Why is a plate necessary when animating with the rig? Let's find out in the next section below!
How Do You Edit Out rigs?
We know that editing rigs out of your animation sounds a bit intimidating. But it's all a matter of literally erasing it out of every frame.
First, you'll need to open the plate you shot earlier in Photoshop.
Next, go to File and click Place Embedded. Look for the first frame with the rig (not the plate) you shot and click Open.
Once the image opens in Photoshop, drag it around until you see the blue guidelines turn pink. That means that your first frame is aligned precisely with the plate.

At this point, all you have to do is select the Eraser Tool and start erasing the rig! As you do that, you reveal the plate behind it.
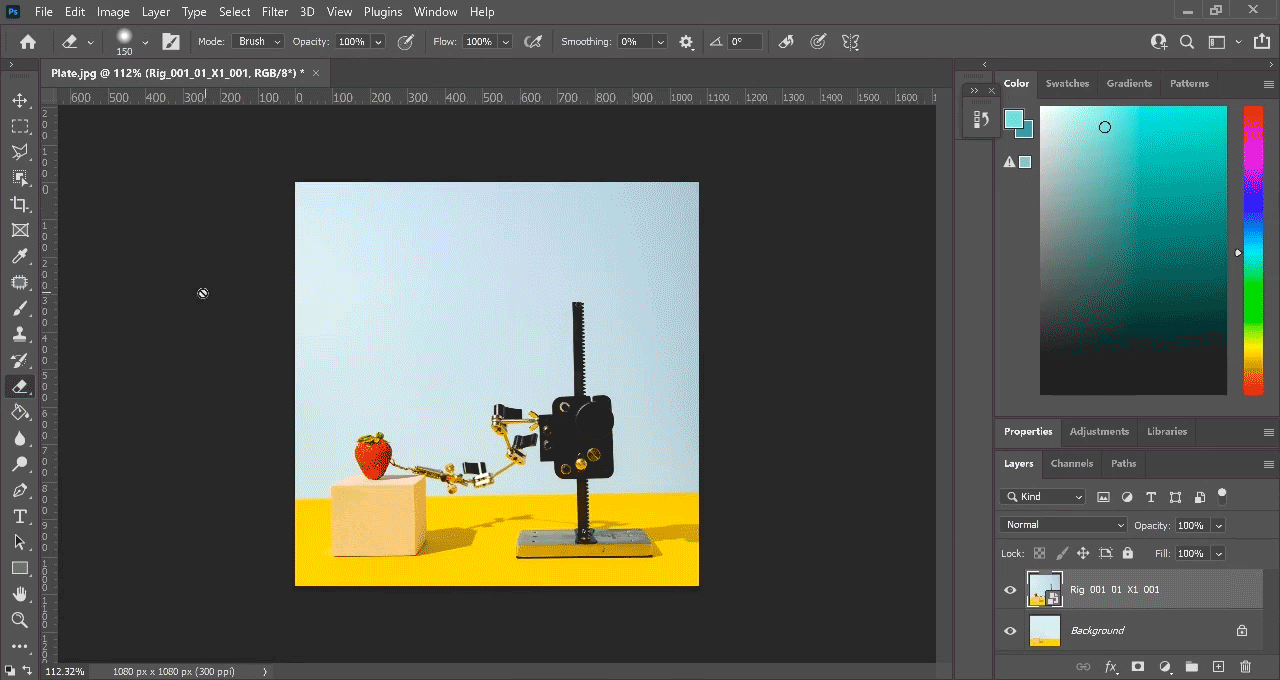
The plate is essentially the same as your top image but without the rig. So when you erase the rig, the background stays the same!
When you have to do some erasing close to your subject, zoom in to ensure you don't erase any details.
Next, use the Polygonal Laso tool to draw a perimeter around the area you want to erase. It doesn't have to be perfect. Just make sure you exclude the main subject so you don't accidentally erase it.

After drawing a perimeter, you can press DELETE or use the eraser tool to remove the rig manually.
Once you finish erasing the rig, save it, and you're ready to tackle the next image!
As you now know, removing the rig is relatively easy. But the real challenge is repeating the process until you remove the rigging in every single frame of your animation.

Our sample GIF with the bouncing strawberry had 28 frames. So that meant we had to erase the rig 28 times!
Admittedly, stop motion requires a lot of skills and hard work. But once you see the result, you'll be delighted to see the magic happen--and so will your clients!!!