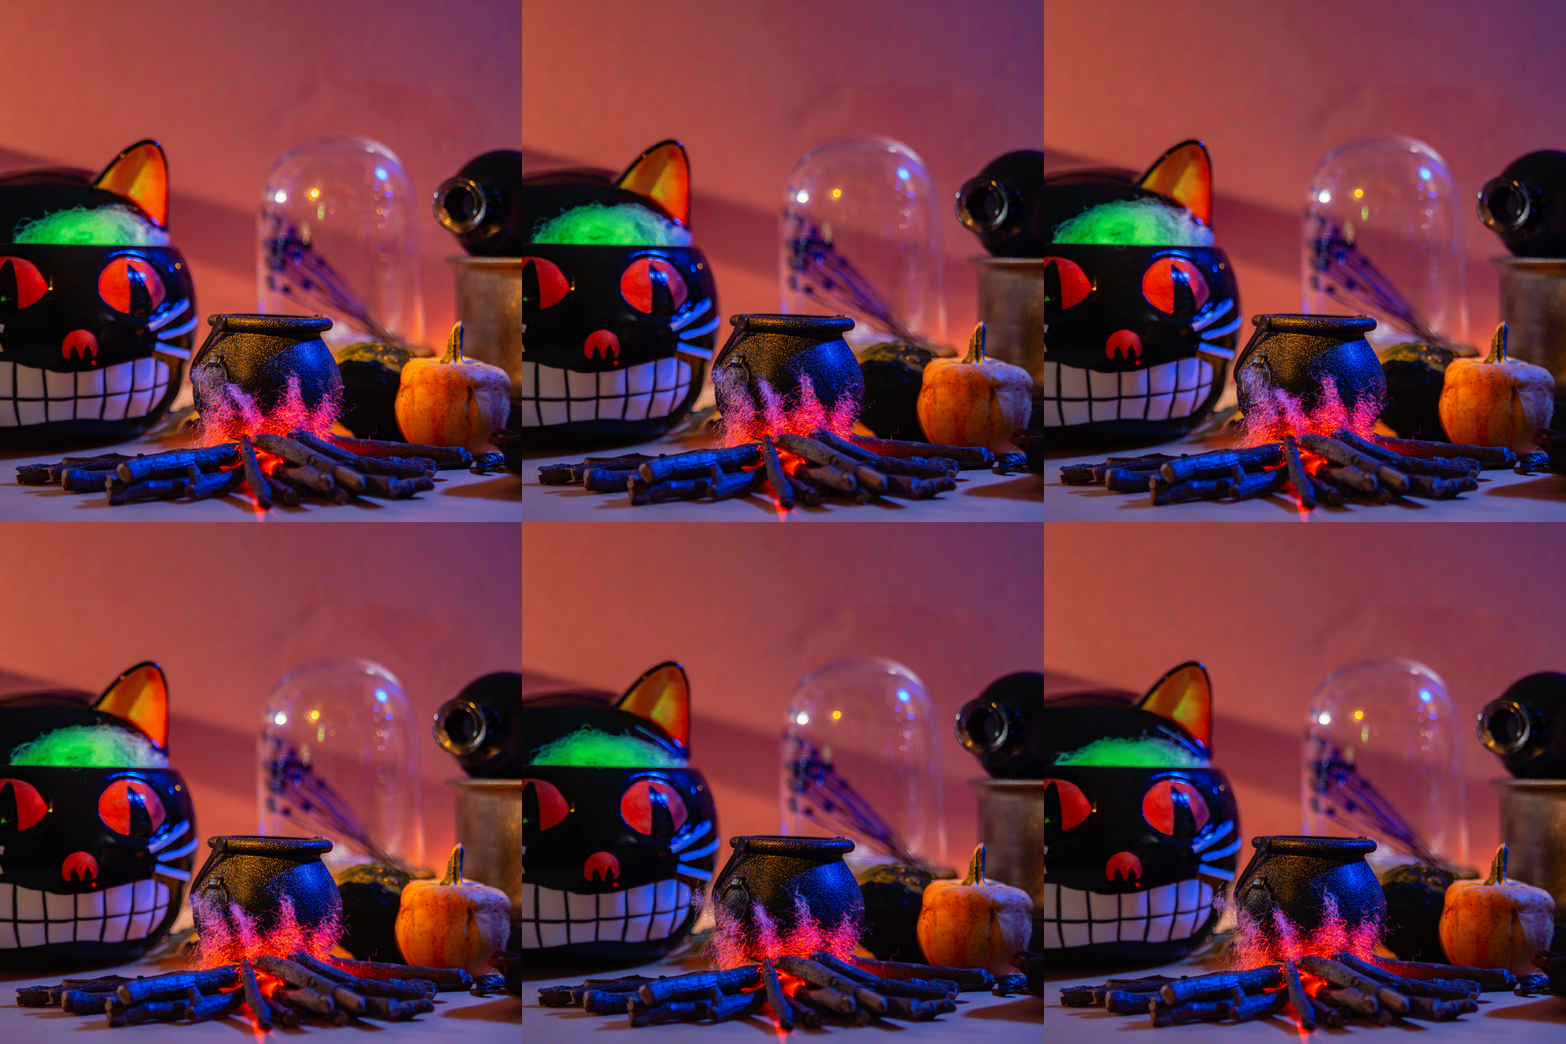
There are many ways to recreate flames in stop-motion animation, including cutting out shapes from cardboard to CGI. But in the spirit of Halloween, we'll teach you the traditional method of animating fire using polyfil, as in movies like Coraline and The Nightmare Before Christmas!

What's polyfil?
Polyfil is the most common material in modern pillows, and it works great as "flames" in stop-motion animation because of its wiry, translucent fibers. Stop-motion animators often use polyfill to create fire, smoke, and explosions.

Things You'll Need:
Polyfil
Micro special effects LEDs
Snoot
Orange and Red light Gel
Tweezers
Step 1: Shape the polyfil wads.
You don't need much polyfil to create flames. All you have to do is pinch a wad of fibers and roll it with your fingers until it looks like the shape of a candle flame. Grab more polyfil to make the fire appear larger if you're animating bigger pieces.

Remember that fire behaves differently depending on the situation. for instance, if you're only cooking, the flames tend to be small and subdued. If it's windy outside, fires tend to be significant and violent. So it's crucial to alter the shape of your wad depending on the type of flames you want to replicate.
Once you prepare the polyfil, arrange them around the object you want to be in flames. In our case, we glued the bottom of our flames to the table around a plastic pot. That way, we didn't have to worry about them accidentally blowing away.
Step 2: Light your flames.
The secret to animating flames is not the use of polyfil but the lighting. It's what makes the fire appear alive.
To light your flames, we suggest using small LED lights when lighting your fire. That way, you can easily hide them behind props.

When animating flames, we usually work with micro special effects LEDs like the one you see above. We like using them because you can program them to blink, flicker, or stay on. And by program, we mean just pressing the button and looking for the effect we like.
We hide the LEDs behind the polyfil flames. Once the light hits the fibers of the polyfil, it creates an effect that replicates flames.
Step 3: Light the set.
When lighting the set, you'll need to carefully recreate the ambient light surrounding the flames.

The light from the fire usually flickers. So it also makes sense for the surroundings to flicker as well. Light from flames also doesn't tend to illuminate the entire room as well as electric bulbs. So it's not unusual to often end up with a vignetted light in the room with lots of shadows.
We placed a CTO (color temperature orange) gel in front of our light to simulate the orange glow from the fire. We also added a snoot to ensure the light was only hitting the pot and the surrounding objects closest to it.
Of course, we added a light on the other side of the set with a CTB (Color Temperature Blue) gel to suggest darkness or nighttime.
Would you like to learn more about nighttime lighting? You can read more about it in this article.
Step 4: Animating the flames.
In theory, animating the polyfil flames should be easy. All you have to do is nudge the fibers a little bit using tweezers.
But in practice, animating with polyfil is like combing curly hair. You'll need to try a few times to ensure it goes in the direction you want to go.

You must move the fibers slowly with tweezers. Don't be too forceful, as you might end up tearing the fibers.
Knowing how to move the flames is also crucial. Before animating, watch actual footage of the type of fire you want to recreate. Some fires move randomly and violently, while others look like they're slow dancing.
In our case, we watched kitchen stove videos and observed how the flames behaved. We then applied what we learned to our animation but exaggerated the movements since we wanted to go for a cartoony vibe.
Step 5: Animating the light.
Of course, you can't forget the flickering light the flames cast upon its surroundings. It's easy to forget this aspect when you're recording live video. But you must include it when doing stop-motion animation.
To create the flickering light from the fire, we had to create shadows by waving our hands in front of the key light with the CTO (Color Temperature Orange) gel!
The secret is to wave our hands at varying times, so the camera doesn't capture any particular light patterns. The movement needs to be random, just like the flickering we were trying to achieve.
Of course, polyfil isn't the only viable material for creating stop-motion flames. Feel free to experiment with other options as well. You can also try using thin fibers from cotton balls or even fake spider webs often used for Halloween decorations. But no matter what material you end up working with, ensure you get the lighting right to help you effectively convey the flame's glow and warmth.