Focus pulling is the technical term of changing the focus of your lens. With cameras that feature fast auto-focus these days, changing focus is relatively easy when capturing live footage.

But like anything else in stop motion, pulling focus when animating requires a different approach. We'll show you a few methods you can use to change your focus while working on your animation.
Why do you need to pull focus?
Did you ever notice that in movies, focus always shifts from one subject to another? A perfect example is when you see two actors exchanging dialogue. When the first actor speaks, you'll often find them to be in focus. But as soon as the second actor starts talking, the focus slowly shifts to them.
In essence, the same rule applies when it comes to animation. You want your focus to shift when another crucial element enters your frame. Sure, you can get away with keeping your focus the same throughout your animated clip. But if you want a more dynamic result, consider incorporating focus pulling when animating.
What is a focus chart and why do you need it when focusing?
Before we dive deep into focus pulling, we need to discuss what a focus chart is and how you can use it to achieve sharp results every time.
A focus chart is a cardboard printed with black and white rays radiating from a black dot. It comes free when you buy Dragonframe's remote keypad. But if you don't have it, you can always buy one online or even print it at home.
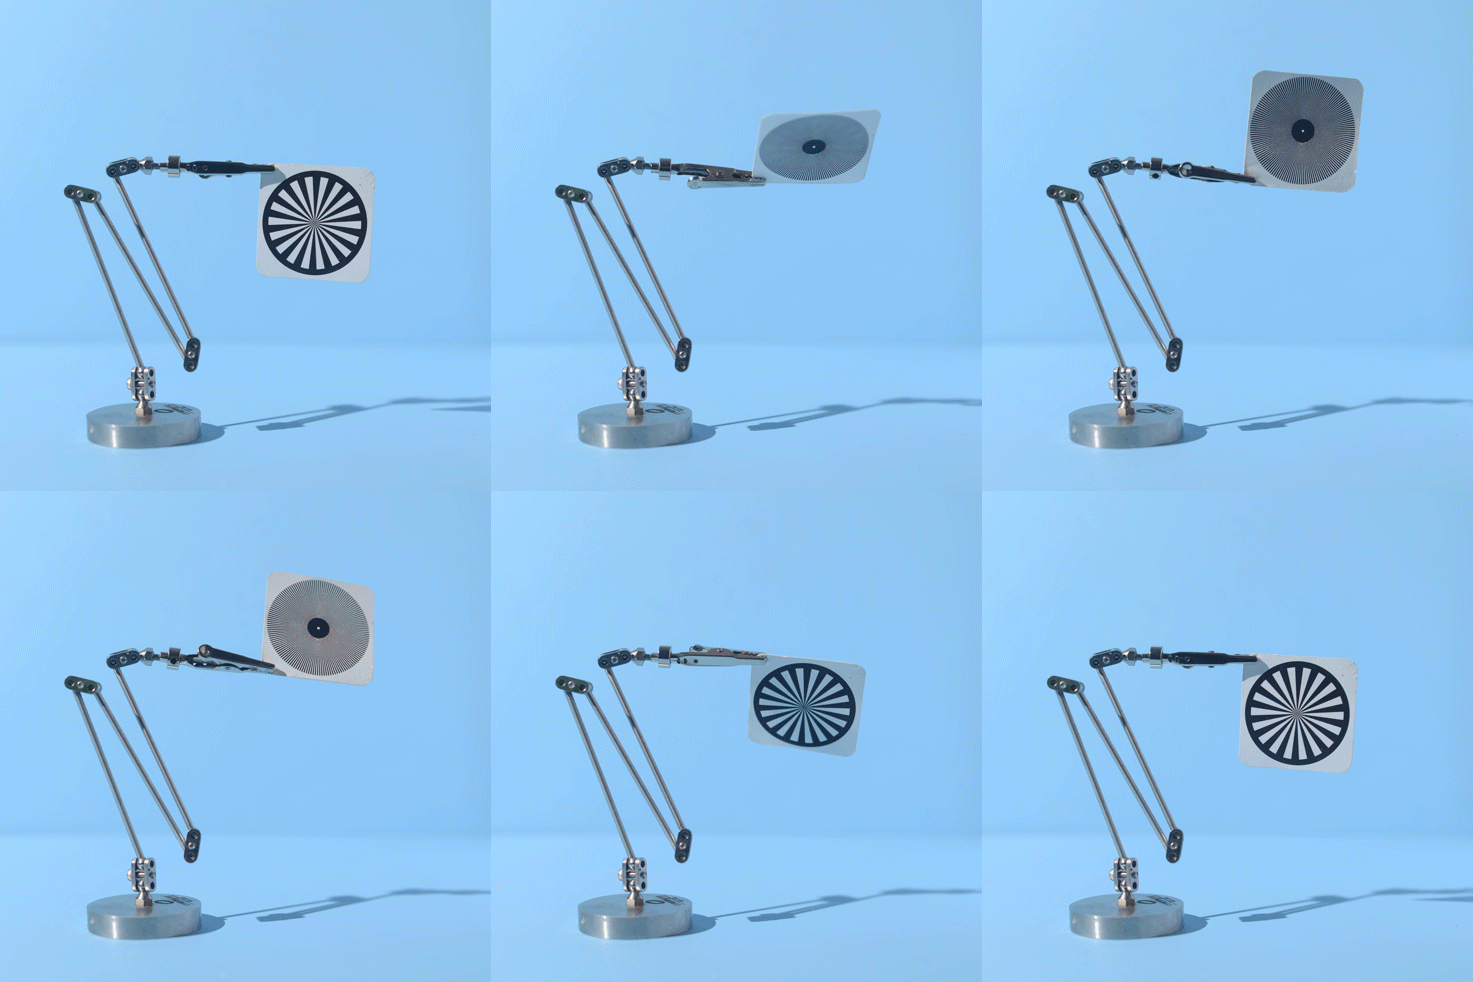
So how do you use a focus chart?
Use your camera's zoom buttons to magnify the image in your live view [note: don't physically move the lens to magnify the image as it will change the perspective of your shot]. If your focus isn't sharp, you'll see on your screen a hazy ball instead of a black dot. And if it's in focus, you'll see the black dot.
Check out our GIF below to see the focus chart in action!
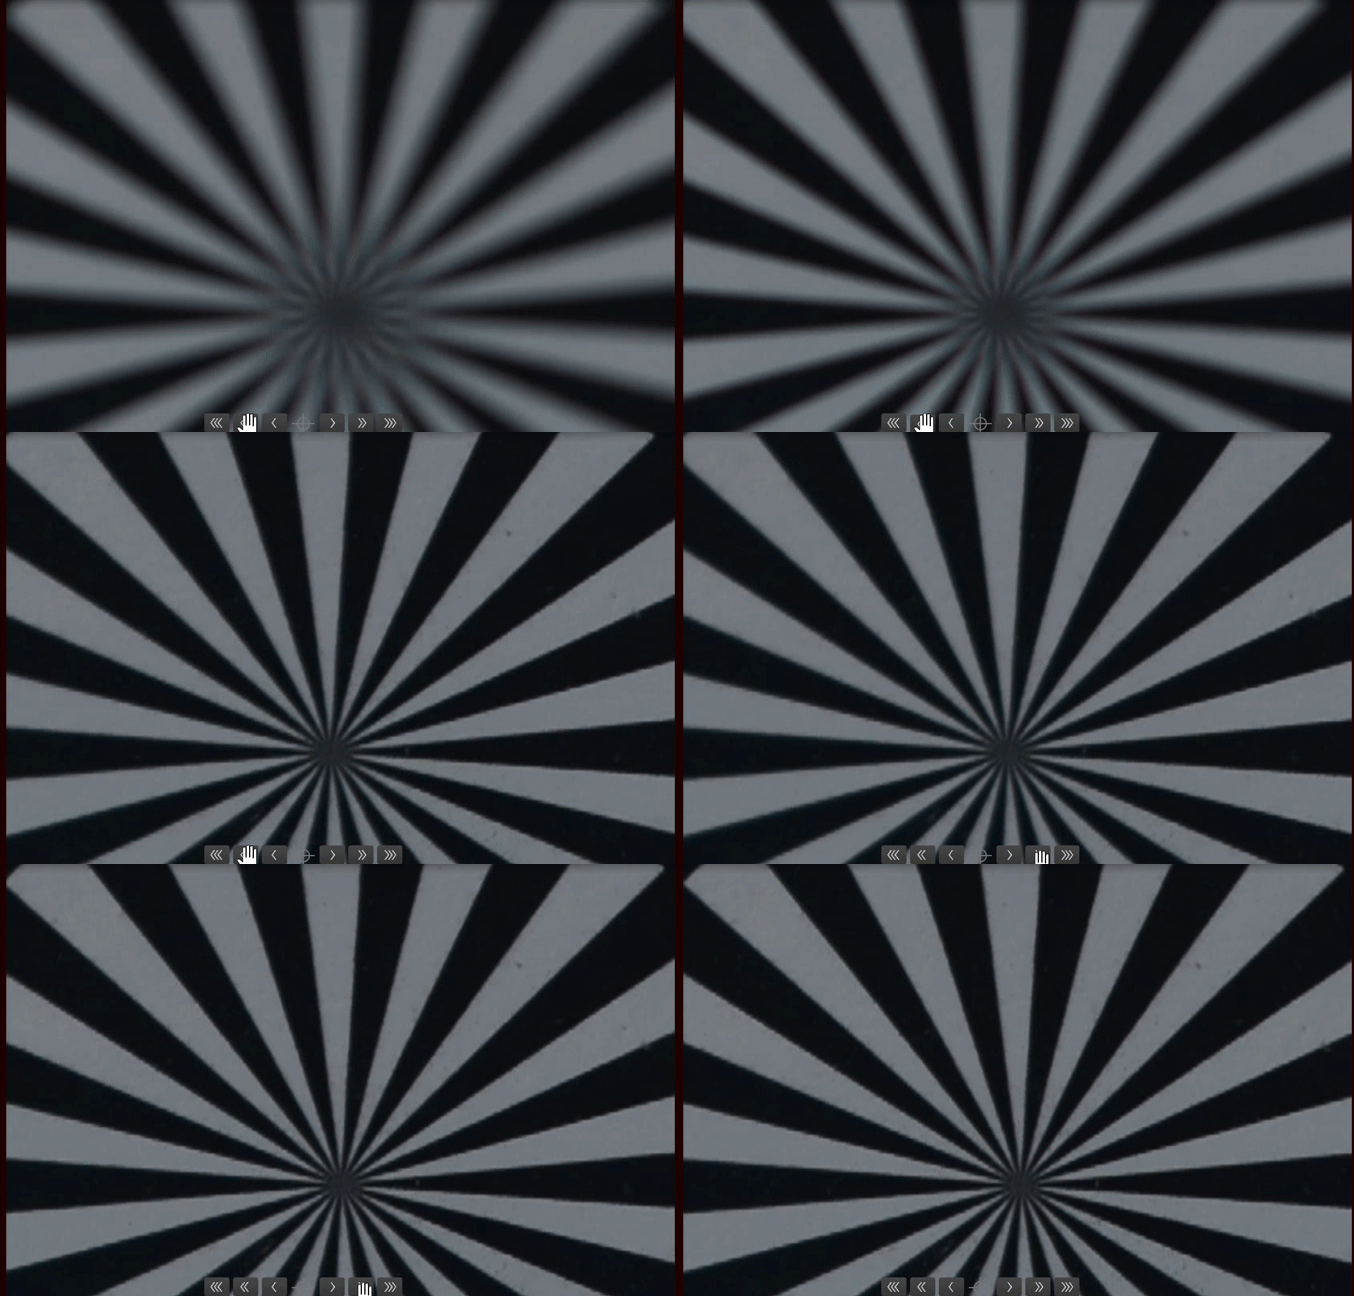
You can place the focus chart directly in front of the subject you want in focus to confirm that it's 100% sharp. Feel free to keep it in place with a small rig (yes, just like in our sample GIF), and so you could easily remove it once you finish checking the focus.
Make sure the card is straight and it touches the object you want to be sharp. Otherwise, your main subject will be blurry once you remove the card.
Manual Focusing
When creating simple animations, you only have to focus once and start animating. But if you need to shift your focus from one subject to another element in your frame, you'll need to readjust the barrel lens just like you would when taking a regular photo.
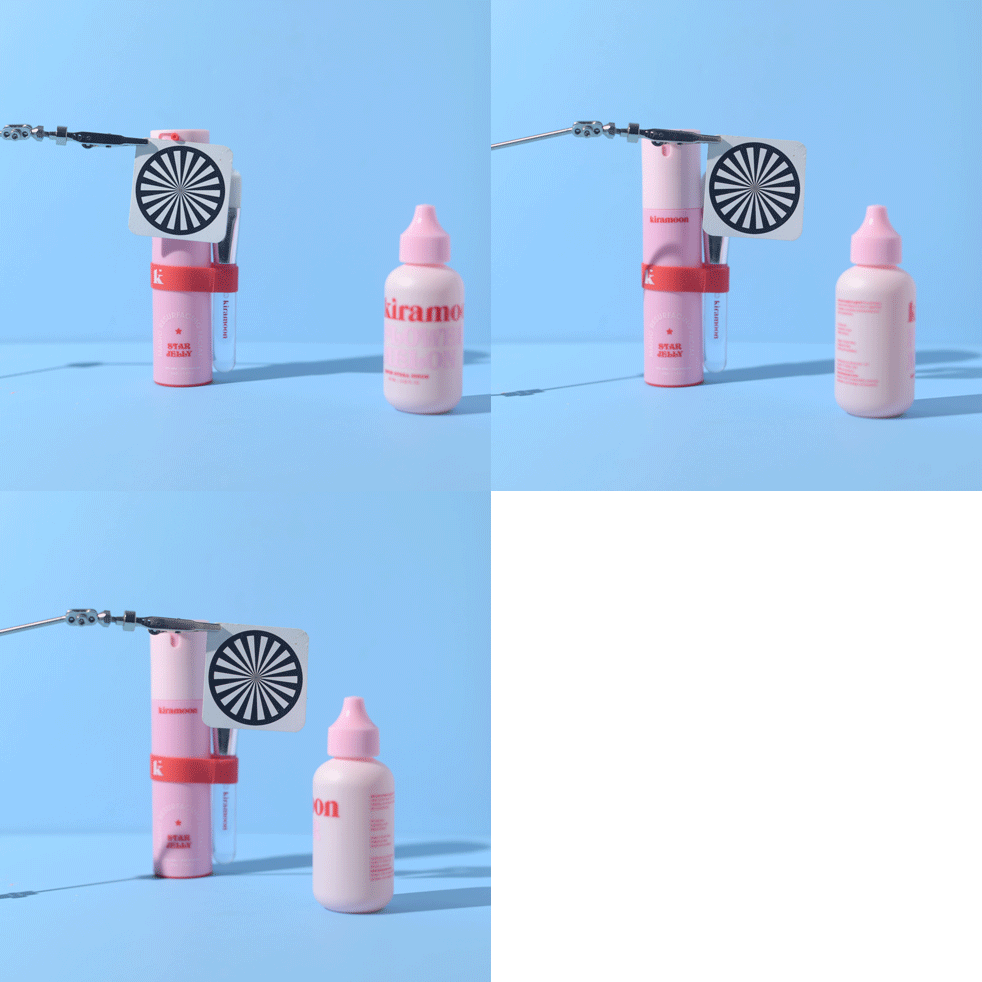
However, the danger of manual focusing is that you could accidentally move the camera. Even a slight shift will be noticeable in your final animation.
Touch Screen Focusing
These days, most cameras let you shift the focus by tapping the touch screen. This method is safer to use than manually moving the lens, so take advantage of it if your device has this feature.
Nonetheless, even touching the camera ever so slightly could still accidentally cause your camera to move. So we suggest that you use this method only when you don't have any other means of changing your focus.
Dragonframe Focusing
The safest method to use when focus pulling is by using Dragonframe. It allows you to control your lens via your computer, so you don't have to touch the camera at all!
Typically, it's best to disable your lens's auto-focus when animating. But if you know, you'll be pulling focus in your project, activate auto-focus so Dragonframe can control it.
To access the focusing tools within Dragonframe, click the Cinematography tab (the camera icon next to the animation tab in the top right corner). There, you'll see a Live View of your animation set.
Below the Live View, click the Target icon next to the Camera icon. You'll see arrows appear on the screen. Use these to shift your lens's focus. The button with the three arrows allows Dragonframe to adjust the lens significantly, while the two and the one arrows are for micro-adjustments.
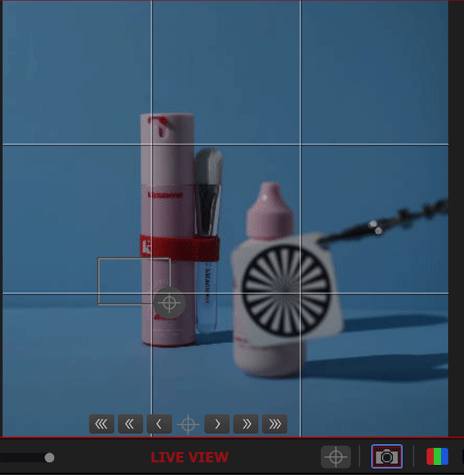
When you select the Target icon, you'll also see a small box in the Live View. Drag it to the area you want to focus on, and click it to zoom in. That way, you can see the details of the object and confirm if it's sharp.
Even if you think your subject is already sharp, we suggest you do a test shot and magnify the image to see if it's genuinely in focus. Once you're satisfied with the result, you can then resume animating!
Like in traditional cinema, there are many creative ways to change your focus. You can quickly focus from one point to another or do it slower. Or, instead of keeping the foreground sharp, you can choose the background to be in focus!
Remember that focus pulling when animating is virtually the same as capturing live movement, and the only difference is that you do those minute changes one frame at a time.