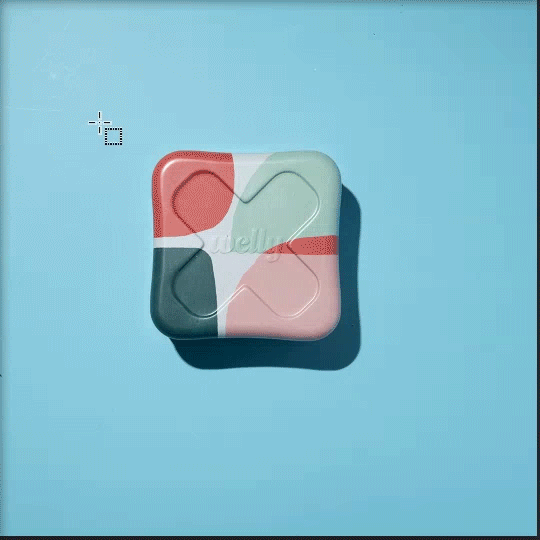
The GIF below was created using Photoshop exclusively using two still images.

Animating with Photoshop may seem a bit impractical at first glance. But we find it quite helpful when creating stop motion in a pinch. We've used this technique so many times to "remix" photos for social media content such as this:
and most recently, this:
Since you can move objects to wherever you desire in post, you have the freedom to experiment with different ideas. Don't like your current animation? All you have to do is reposition the individual elements in your image and play around with the movements.
Note: Technically, you can also animate still images using After Effects since it allows you to automate motion with a few clicks. But we find that going this route makes the animation a bit too artificial because the movements are often too smooth and uniform.
So how does it work?
To help you better imagine how the technique works, you can compare it to playing with paper cut-outs. You cut out specific elements from the available photos and move them around using Photoshop.
The process works much like traditional stop motion. Except for this time, we manipulate our subjects with our keyboard or mouse.
What are the prerequisites for animating with Photoshop?
Using Photoshop to animate social media stop motion isn't a foolproof process. Since you're practically working with photo "cut-outs," there are certain limitations to what you can do. Below is a list of requirements to ensure you achieve the best results when using this process.
Choose evenly-lit images.
When you move an object around, you'll notice the shadows change as well. Unfortunately, that won't be possible when working with 2D images.
We suggest using photos with minimal shadows so that people won't notice any changes (or the lack thereof) as the elements in your animation move.
Of course, you can also use pictures with stark shadows (we do it all the time!). But make sure you don't spin it around or make any other drastic movements. Otherwise, people will notice the shadows stay in one direction even as an object's orientation changes.
When possible, stick to flat lay shots.
As we mentioned earlier, the main issue with animating in Photoshop is dealing with shadows.
In general, shadows are easier to deal with when an object lies flat on a surface because the shadows follow the object's profile.
But if the object is standing up, the shadows tend to appear distorted. Consequently, those distortions are difficult to replicate when animating in Photoshop without appearing fake.
So what's the solution? Use flat lay shots for Photoshop animation. It will make life easier for you!
Work with simple, flat backgrounds.
Even when you place an object flat on a table, the shadows it produces will still conform to the texture of the table's surface. If it's rough, the shadows will appear jaggedy as well.
Since you're working with a photo with "fixed" shadows, choosing a flat background without any textures would be best. That way, you don't have to worry about those shadows conforming to the background's texture.
We often choose a color background. But you're free to pick other backdrops such as smooth concrete and polished wood as well.
So what's the process for animating in Photoshop?
Step 1: Choose your still photo/s.
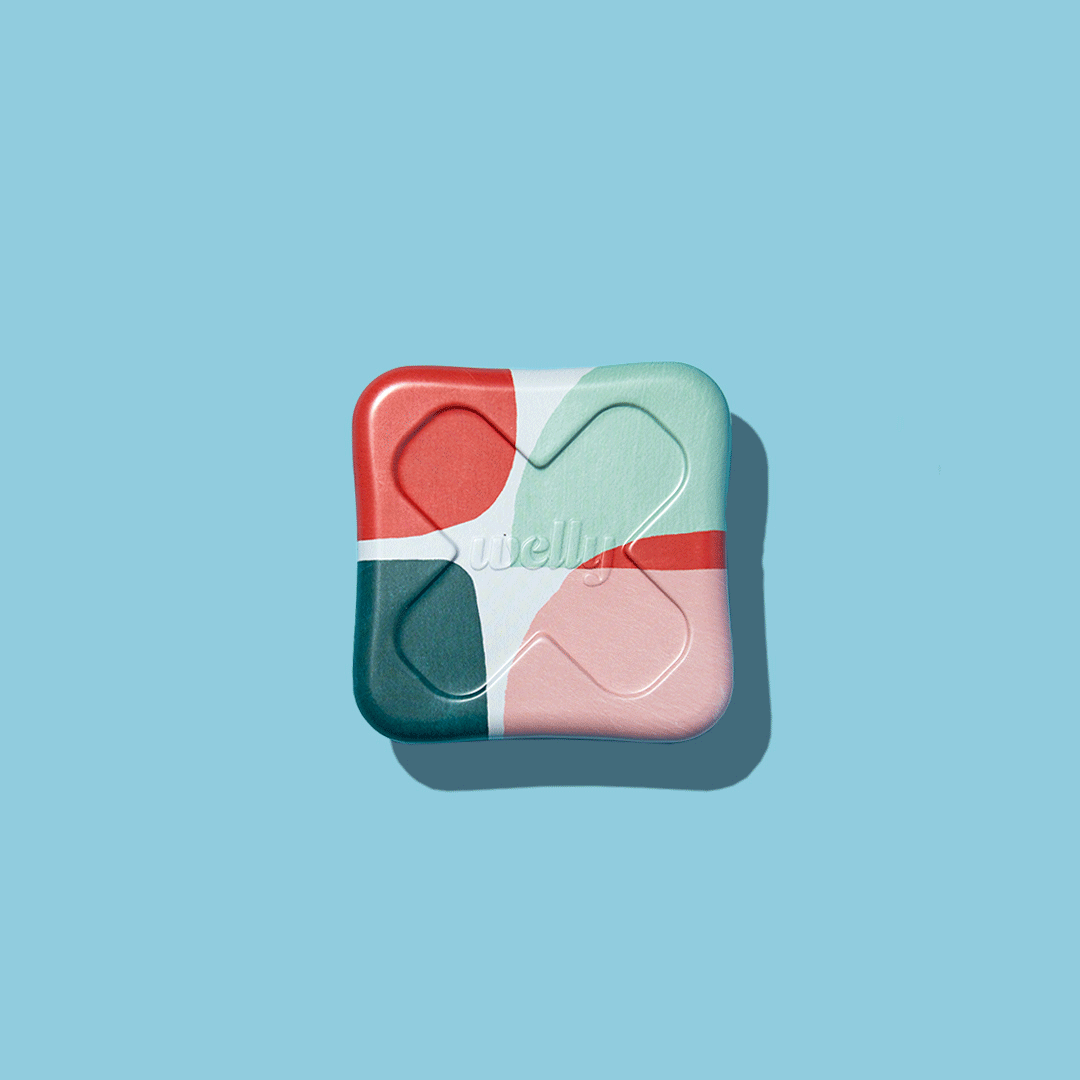
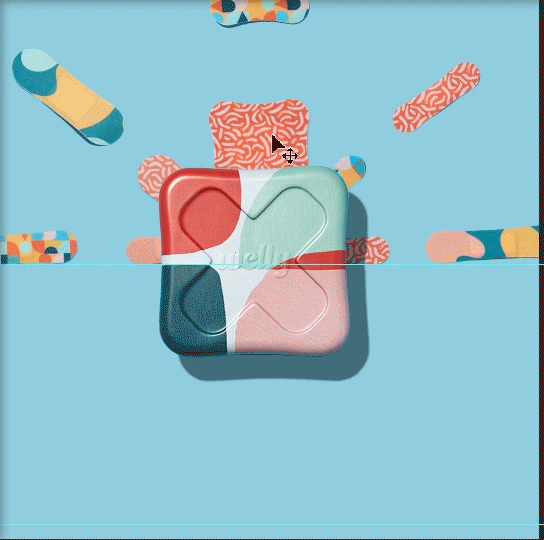
For this animation, we worked with this image:

As well as an image of these bandages:

Technically, we could have combined them into one shot. But we wanted to maximize the resolution of the tin can, so we shot it by itself instead.
Step 2: Isolate the objects in your photo/s.
We use the Object Selection tool to cut out the elements we need for our animation. It's the quickest and easiest way to create a selection.
If the Object Selection tool has trouble isolating your selection, feel free to use the Pen Tool instead.
You can include the natural shadows in the original photo. But for us, we prefer removing them to replace them with artificial shadows later.
Once you finish your selections, save the individual cut-out files as PNG to retain a transparent background.
Step 3: Drop the images into the new background.
Open a new file and set the dimensions you prefer. We used 1080x1080 because it's the perfect size for Instagram. We then used a Paint bucket to fill the background with Blue.

You can then drag and drop the cut-out images into the new background.
Step 4: Add a Drop Shadow
Note: Please skip this step if you choose to retain the natural shadows from your original image.
A Drop Shadow is an artificial shadow you can add to elements in Photoshop. We use it in place of real shadows because it conforms to the background and when adjusted properly, looks authentic.
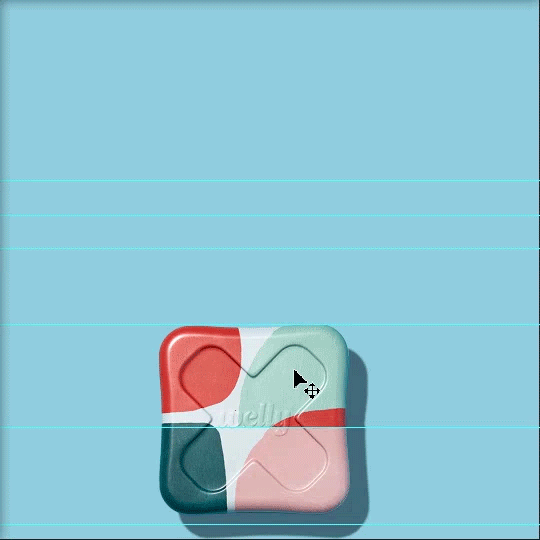
Let's look at the sample image below. As you can see, the drop shadow also goes over the bandage naturally.

In contrast, if you use the real shadow from the original picture, it will hide the bandage behind it since it's opaque.

To apply Drop Shadow, click the FX button at the bottom of the Layers panel and select Drop Shadow.
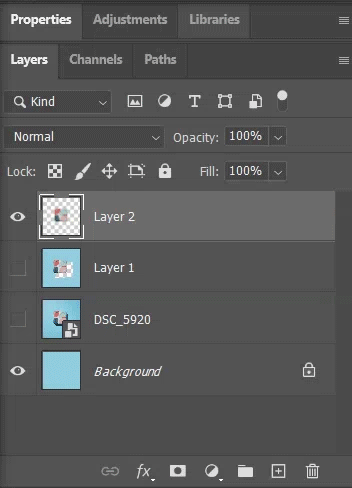
Once you select Drop Shadow, a control panel appears. Feel free to change the Opacity, Distance, Spread, and Size of the Shadow until it looks natural.

You can also use the mouse to move the shadow around to your desired position.
If possible, place the drop shadow in the area directly opposite the light source. Since the light source in our picture comes from the upper left corner, we positioned our Drop Shadow on the lower right side of the cut-out.
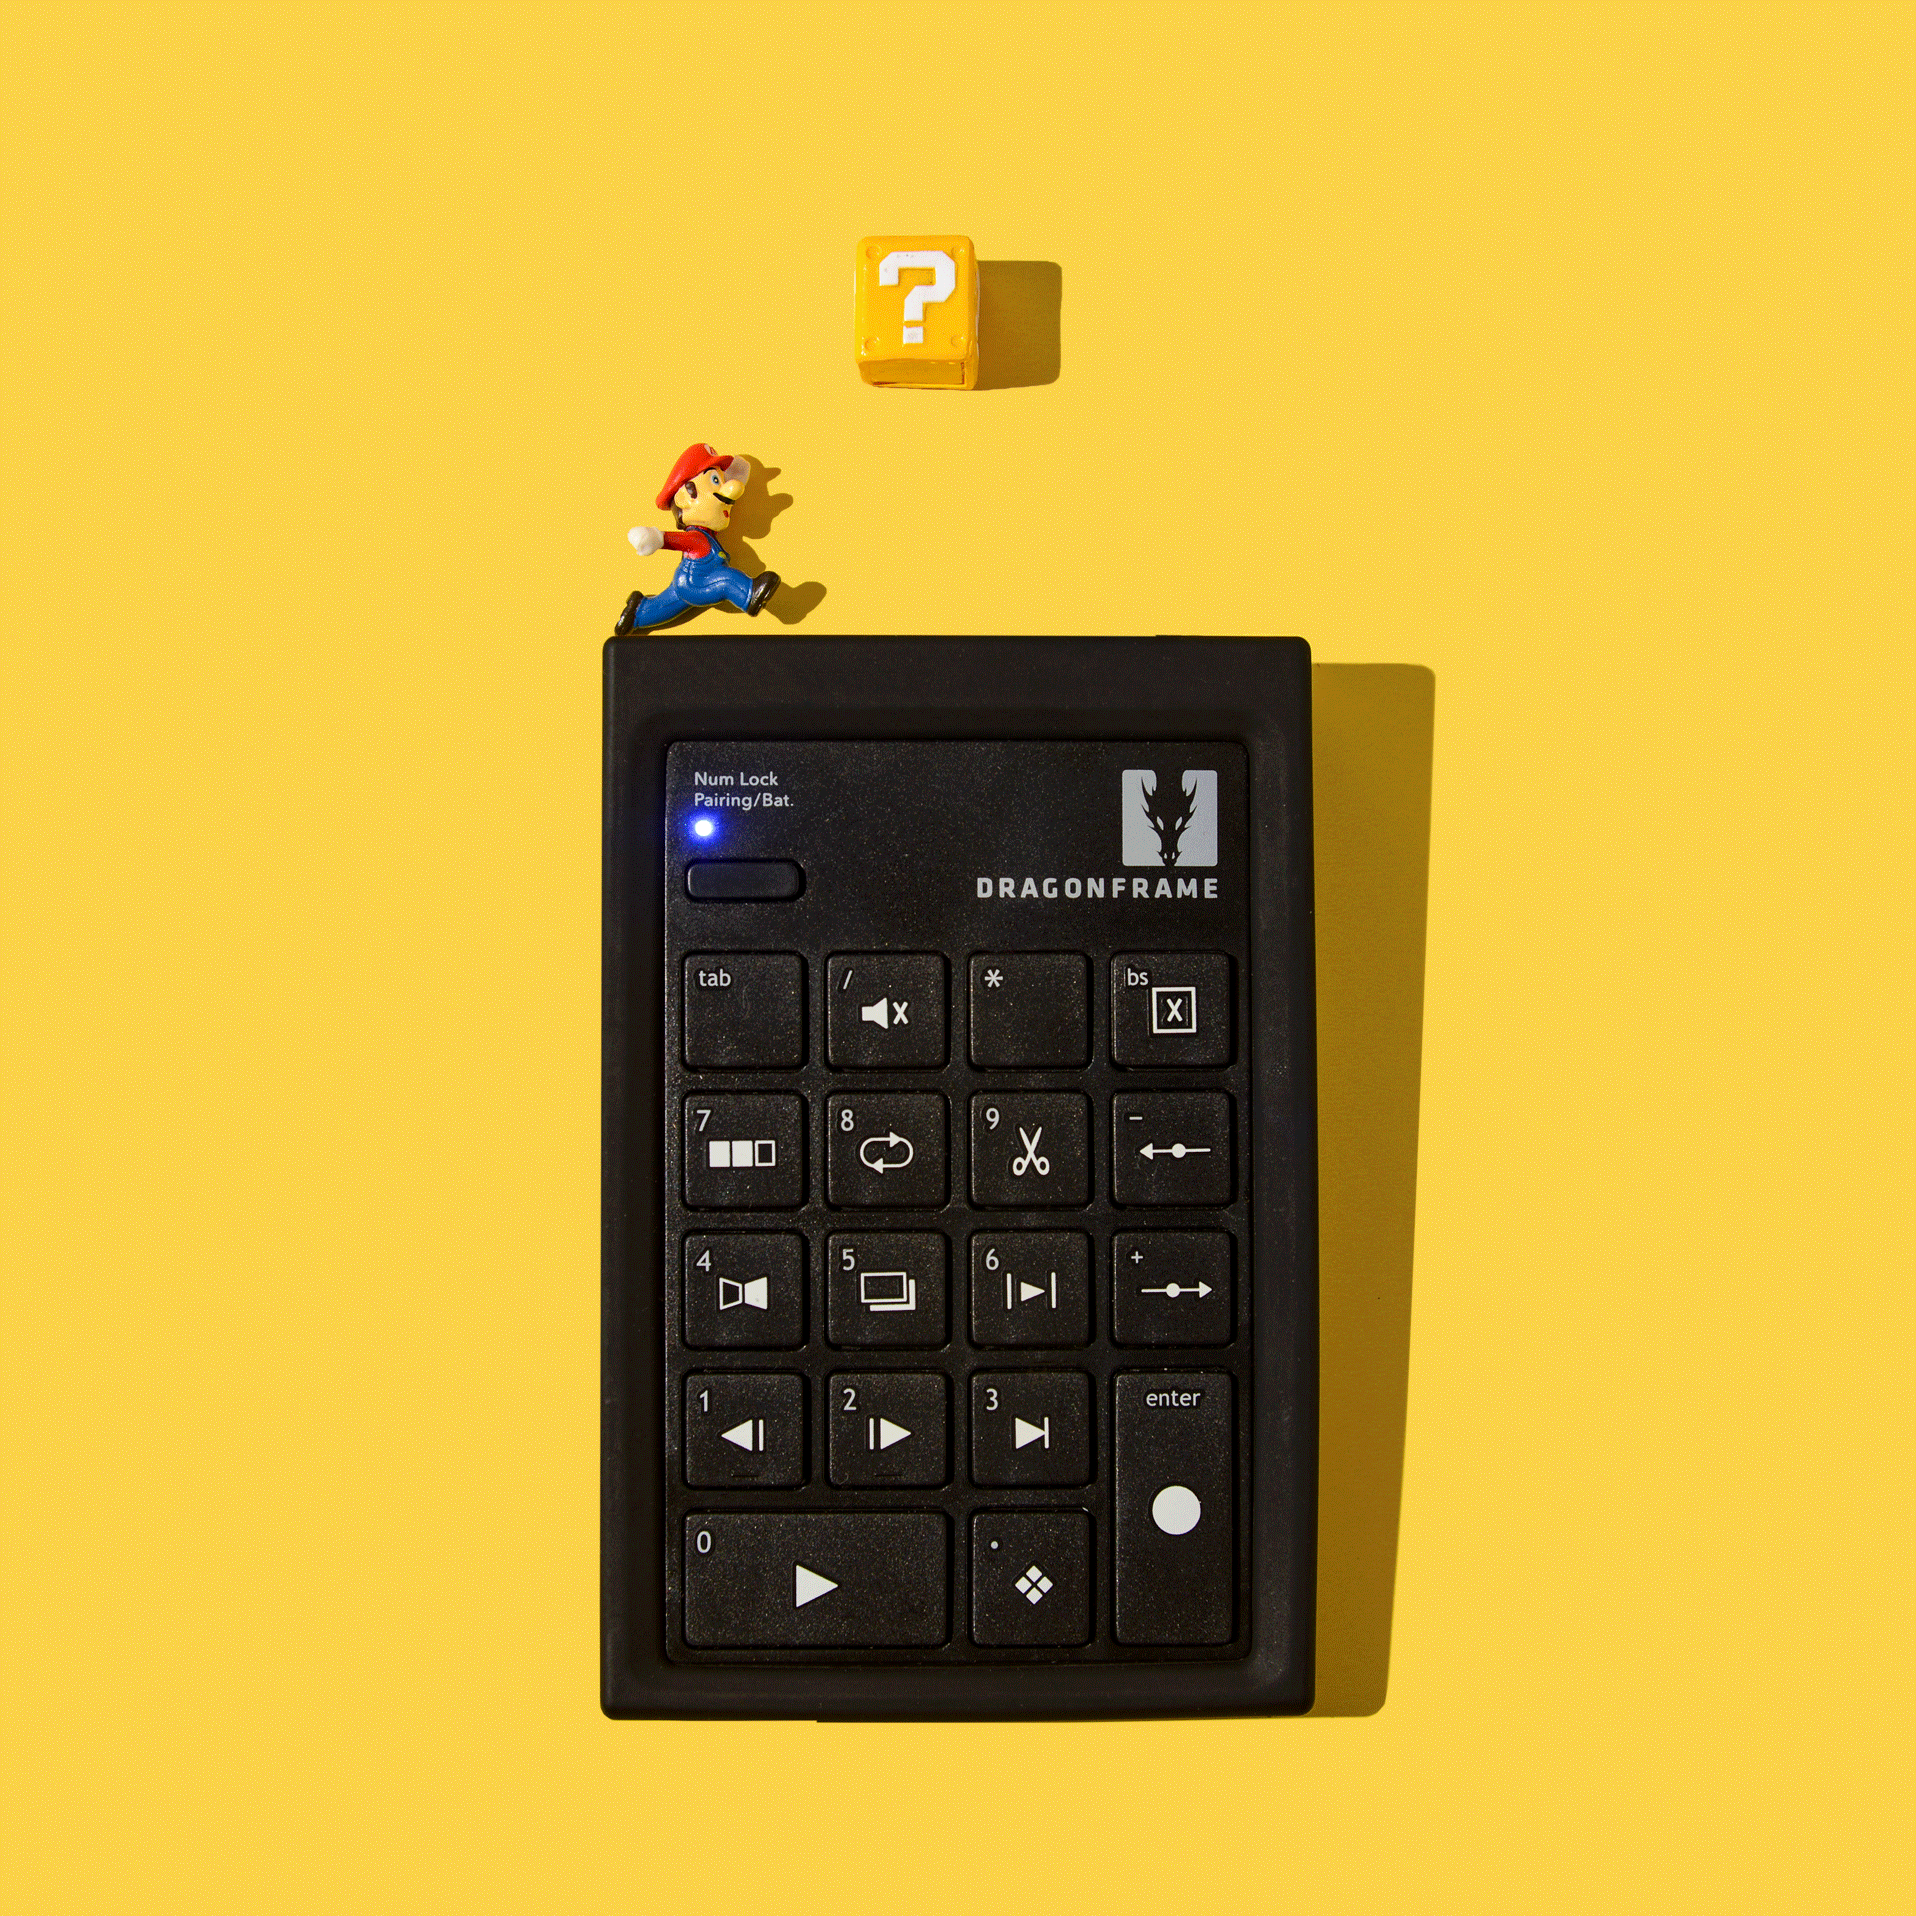
Step 5: Add Rulers.
When animating with Dragonframe, you have the option to add markers to help you figure out the positions of the animated objects. To a degree, you can do the same in Photoshop by adding rulers.
Click View in the Menu panel and select Rulers. They will then appear in your workspace.
To add lines, all you have to do is drag your mouse down or sideways from the horizontal or vertical ruler. Let go once you reach the area where you want to place the line.
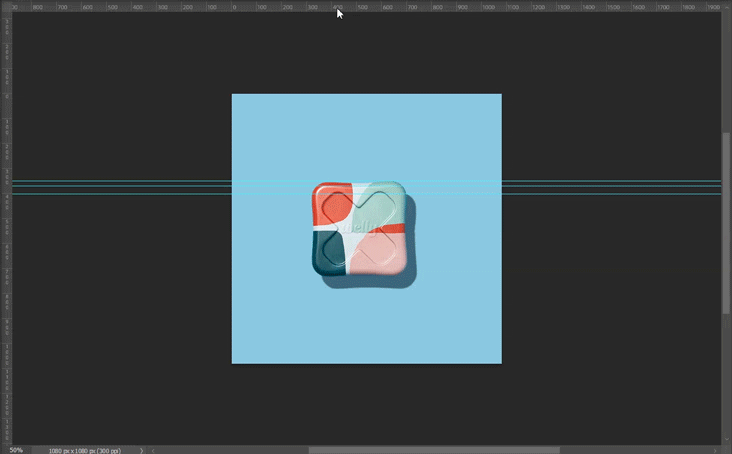
For this animation, we used the lines to help us figure out where to move our tin can of bandages per frame.
As you notice, the lines are far apart near the bottom of the frame. But those gaps get smaller as we reach the center. This is because we want the tin can to slow down as it hits the middle of the frame.
As you already know, the wider the increments, the faster the animated object will "move." And the smaller the gaps between those lines become, the slower the object moves.
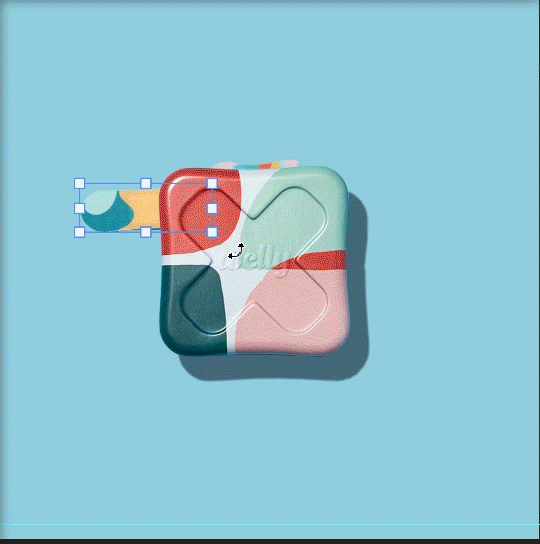
Step 6: Use your mouse or keyboard to move the cut-outs.
First, select the layer that contains the cut-out you want to move. Next, select the Move Tool, which you can find at the very top of the toolbar.
At this point, all you have to do is use your mouse or Up, Down, Left, and Right keys to reposition the cut-out.
We often use the arrow keys because they allow us to move the elements in our frame more accurately.
But if we need to rotate an object, we double-click it or press CTRL-T and use the mouse to change the orientation of the selection.
Step 7: Export the frames.
Once you finish moving the cut-out, remember to export it as an image file (jpg, png, etc.). This part is equivalent to taking a photo of a frame.
After saving the file, you can move the cut-out again and repeat the same process until you finish the animation!
As you can see with the result, the animation looks so seamless. That's all because, despite using a digital program to create it, we still manipulated the movements manually. So the slight "jitters" common in stop motion are still visible.

Next month, we will be creating another version using Adobe After Effects. Since this program has features that let you automate the movement, the process will be quicker, and the results will be smoother (although we have to admit that it wouldn't look like a real stop motion clip).